- Edited
Info:
Curve Architect is a general purpose deformation tool for Unity Game engine. It has 3 main features: Mesh deformation, terrain deformation and moving objects/deformations along Architect Curves. All curves can use any of these three features simultaneously.
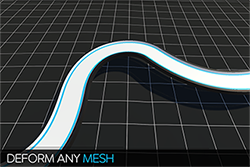
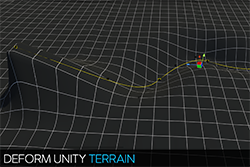
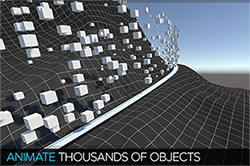
A video where I explain most of the features in Curve Architect:
https://www.youtube.com/watch?v=NRClnF72tIw
Bugs:
Current known bugs are listed here.
Unity versions:
Works with: Unity 2019, 2020, 2021, 2022 and 6 with all render pipelines.
Set-up:
Unity 2020, 2021, 2022, 6
Open package manager --> Go to My Assets --> Download and Import Curve Architect --> Press Install/Upgrade
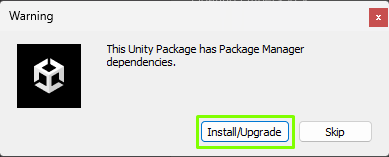
Unity 2019
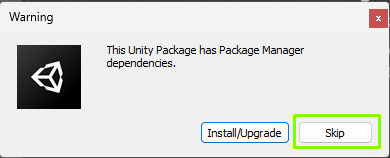
Window --> Package Manager --> In the Advanced drop down menu press "Show preview packages" --> Install the collection 0.9.0-preview.6 package --> Import Curve Architect --> Press Skip
Usage:
General
Move, delete, duplicate, rotate, and scale deformations on Architect Curves as you normally would with any GameObject. You can also move deformations/followers between Architect Curves by re-parenting them to another Architect Curve in the hierarchy menu. Unparenting them from an Architect Curve will revert them to the original object. You can also deform prefabs, and prefabs that has hierarchy's within them.
Create deformation:
Parent the object to any Architect Curve or Architect Curve Object. This will automatically generate a new mesh derived from the original mesh that the GameObject had in its Mesh Filter or/and Mesh Collider component.
Remember to have enough vertices on your meshes. Otherwise, they will not look smooth when deformed.

Create follower:
Parent the object to an Architect Curve or Architect Curve Object. After that, select the Game Object and change type to Follower.
Deform terrain:
Select an Architect Curve and press the button with the terrain icon on the bottom of the menu. Place the Architect Curve where you want to deform the terrain. Press "Deform terrain".
Animations:
You can animate any deformation or follower using Unitys built in animations system or script your own behaviors. If you see the small red icon in the upper left corner, you need to enable read/write access for that mesh (only for deformations). Otherwise, you can't animate it.
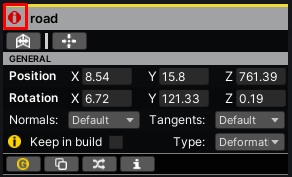
Find the mesh in your project folder --> check the Read/Write box --> press the apply button.

After enabling Read/Write access you need to update the mesh by moving it or moving the Architect Curve. After that, the icon will disappear.
Children of Deformations:
You can parent a deformation or follower to another deformation, and it will be updated and deformed within that deformation’s local space. This can be useful for animating a train with different wagons. You can animate the train using Unity’s built-in animation system or through scripting, and all the wagons will follow. Note: A deformation can be an empty GameObject.
Children of Followers:
Parenting a deformation or follower to another follower will make the object behave like a normal GameObject that ignores the curve space.
Menus/Features:
Curve Architect has its own menu and selections system. You have different menus depending on what you have selected. Architect Curves, control points and deformations all have their own with different submenus and settings. Toggle between submenus with the bottom buttons. Some menu items have yellow icons. You can hover over these icons to get information about the specific menu item.
Nearly all functions in Curve Architect can be found within these menus except for shortcuts. We will try to explain each feature below by going through all the menus.
Main menu - general:
When you have installed Curve Architect this menu will appear:

This is the main menu and will always be visible if you don't hide it with the "hide" button.
Top buttons:
- Create mode | lets you create new Architect Curves or control points on the selected architect curve.
- Hide Architect Curves | Hides none selected Architect Curves.
- Enable grid | Enable or disable the grid. Snap control points to the grid to create perfect 90°, 180°, 270° loops, and more.
- Show normals | Toggle normals on or off.
General:
- Grid size | The size of the grid, visible only when the grid is enabled.
- Snap length | The snap length for objects attached to an Architect Curve.
- Handle type | Change handle movement type from Continuous, Mirrored and Broken.
Main menu - settings:

All settings under "Project Settings" are saved in CurveArchitect/Editor/Settings/ProjectSettings.conf. These settings are project-wide and are intended to remain consistent for everyone working on the same project.
Settings:
- Curve line resolution | The resolution on all Architect Curve lines.
- Normal spacing | How many normals that will be drawn for very 100 meters of an Architect curve.
- Control point size | Change the size of all control points on Architect Curves.
- Enable info icons | Turn on/off info icons (yellow (i) icons).
Project settings:
- Resource data | Create resources for Architect Curves during scene save or game build. If you choose to generate resources during the game build, be aware that the build time will increase, as each scene in the build settings must be opened before the build process, to generate the necessary data. While this process is typically quick, it can become time-consuming if you have many scenes. In that case, it may be preferable to generate resources during scene save instead.
- Mesh data | Generate meshes at editor startup or save meshes in the scene file. Can greatly reduce the size of the scene files. Generated meshes will still be integrated and exist in the build. However, this can have implications when playing in the editor, especially if you rely on the meshes being available immediately at startup. In such cases, it might be better to avoid generating colliders (if that's what you are dependent on) and instead save them directly in the scene.
- Path | Automatically or manually set the path to Curve Architect. Having the wrong path will make menus look broken. They will however still work correctly.
Main menu - info:

General info about Curve Architect.
Architect Curve - deformation:
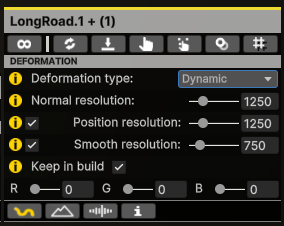
Will appear when an Architect curve is selected. Settings for deformation type, resolution and color for the Architect Curve.
Top buttons:
- Toggle loop | Toggle loop for the selected Architect Curve.
- Reverse control points | Reverses the order of all control points.
- Flatten control points | Flatten all control points to the same Y value.
- Select and center Architect Curve transform | Selects the Architect Curves transform. Also centers the transform to the center of all control points.
- Select all anchors | Selects all the anchors of the Architect Curve.
- Join selected Architect Curves | Joins all the current selected Architect Curves.
- Align grid for selected Architect Curves | This button is only visible when the "Grid" option is enabled. It aligns the grid for all selected Architect Curves, allowing you to work seamlessly on the same grid across multiple Architect Curves.
Deformation:
- Deformation Type | Change between static and dynamic deformation. Static curves do not use cached normals and, because of this, consume less memory. They can also be easier to work with since their normals do not change in the same way as those of a dynamic curve. However, dynamic curves are capable of handling more advanced shapes, such as loops.
- Normal resolution | The resolution of cached normals. Only used by dynamic Architect Curves.
- Position resolution | The resolution of cached positions. You can turn of this feature but you will lose performance by doing that.
- Smooth resolution | By default, retrieving positions along a Bezier curve results in uneven spacing due to the bezier curve's nature. Curve Architect includes a smoothing system designed to counteract this, ensuring even distribution of positions across the curve, which prevents deformations from becoming squeezed or elongated. A higher value will increase this effect. You can also completely turn off this feature.
- Keep in build | If checked, the ArchitectCurve component will persist in your built game. If unchecked, it will be removed for performance reasons and will not be accessible in your built game. To enable animations on a specific ArchitectCurve, the "Keep in Build" setting must be checked.
- R, G, B | Change the color of the curves control points and unselected line. Selected curve will always have a yellow line.
Architect Curve - terrain:
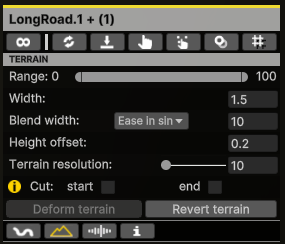
Will appear when an Architect curve is selected and you have pressed the bottom terrain button. Displays terrain deformation settings and usage.
Terrain:
- Range | The range of the architect curve that should deform the terrain.
- Width | Width for the terrain deformation.
- Blend width | Determines the horizontal extent of terrain deformation, Defining the transition area where the terrain shifts from its original to its deformed state. You can also change its curvature by setting different easings.
- Height offset | Extra height added between the curve and terrain.
- Terrain resolution | Increase the quality of terrain deformations. Try to increase this value if you get unwanted behaviors when deforming terrain.
- Cut | Hard stop for terrain deformation at the start or end. This can be useful when deforming curves together.
Architect Curve - noise effects:
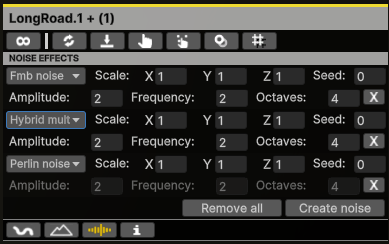
Will appear when an Architect curve is selected and you have pressed the bottom noise button. Displays all the noise settings that will change the behavior on mesh deformations, terrain deformations and animations.
Nose effects: Perlin Noise, Billow noise, Domain warped noise, Voronoi noise, Terrace noise, Ridged perlin noise, FMB noise, Hybrid multi fractal noise.
Architect Curve - info:
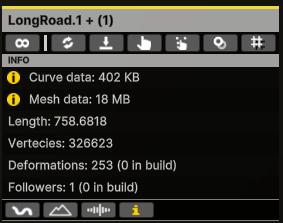
General info about the Architect Curve, how much data it takes in memory, length of the curve and so on.
Deformation - general:
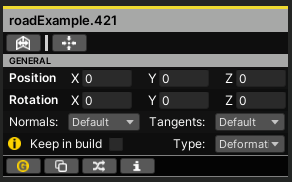
Will appear when a deformation is selected.
Top buttons:
- Mirror deformation | You can achieve the same deformation effect by scaling negatively, but this approach may cause collision issues in some physics systems. Using the mirror function ensures compatibility across all physics systems without any collision problems.
- To center | Sets the x and y position to 0 and also Euler rotation to 0, 0, 0.
General:
- Position | Sets the position in curve space.
- Rotation | Sets the rotation in curve space.
- Normals | Choose between smooth normals, default normals, or opt not to calculate normals. Smooth normals can resolve lighting issues on damaged meshes.
- Tangent | Turn off or on tangent calculations.
- Keep in build | If checked, the ArchitectCurveObject component will persist in your built game. If unchecked, it will be removed for performance reasons and will not be accessible in your built game. To enable animations on a specific ArchitectCurveObject, the "Keep in Build" setting must be checked. To check "Keep in Build," you must first ensure that "Keep in Build" is checked for the corresponding ArchitectCurve.
- Type | Change between Deformation, Follower and None. "None" objects will behave as normal objects and don't interact with the Architect curve.
Follower - general:
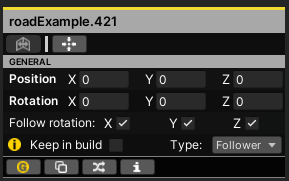
Will appear when a follower is selected.
General:
- Position | Sets the position in curve space.
- Rotation | Sets the rotation in curve space.
- Follow rotation | Only follow specific axles when the object are moved along the Architect Curve. Turning all axles off will improve performance for animations.
- Keep in build | If checked, the ArchitectCurveObject component will persist in your built game. If unchecked, it will be removed for performance reasons and will not be accessible in your built game. To enable animations on a specific ArchitectCurveObject, the "Keep in Build" setting must be checked. To check "Keep in Build," you must first ensure that "Keep in Build" is checked for the corresponding ArchitectCurve.
- Type | Change between Deformation, Follower and None. "None" objects will behave as normal objects and don't interact with the Architect curve.
Cloning:
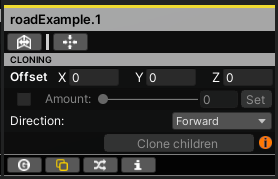
Will appear when a deformation or follower is selected.
Clone a single follower/deformation or a sequence of deformations/followers. Start cloning by attaching children to any deformation. An deformation can also be an empty Game Object which can be handy to use when it comes to cloning. All children will be part of the sequence that will be cloned. Children attached to a follower cant be cloned. This is because the followers transform those not exist within the curve space.
Note: You can always move or rotate individual clones if necessary.
Example on how to clone:
- Create an empty game object.
- Attache the empty game object to any Architect Curve.
- Set rotation and position values to (0, 0, 0) within the Curve Architect menu.
- Attache a single follower or deformation to clone or create a sequence of object to clone.
- Press Clone children.
General:
- Offset | The offset between each clone/clone-sequence.
- Amount | Set clone amount or automatically clone to curve end or start.
- Direction | The direction to clone.
Randomized offset:
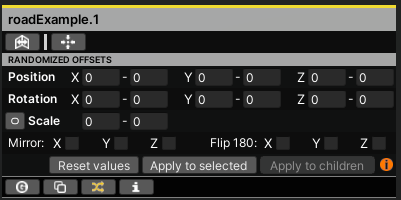
Will appear when a deformation or follower is selected. Randomize selected objects, or children to selected object. The "Apply to children" button is only enabled with type deformation.
General:
- Position | Min and max values for position.
- Rotation | Min and max values for rotation.
- Scale | Min and max values for scale. You can randomize all axles with the same min/max value, or press the small button on the left of scale, and individual scale each axle.
- Mirror | Enable mirroring on each axle.
- Flip 180 | Enable randomly flip objects 180 degrees on each axle.
Control point - general:
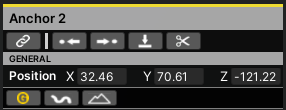
The menu when a control point is selected.
Top buttons:
- Link to closest control point | Links the selected control point to closest control point on same Architect Curve or Architect Curve.
- Next control point | Go to next control point.
- Prev control point | Go to prev control point.
- Flatten control points | Flattens only the selected control segment.
- Split architect curve | Splints the Architect Curve in to two curves at selected control point.
General:
- Position | World position for the selected control point.
Control point - deformation:
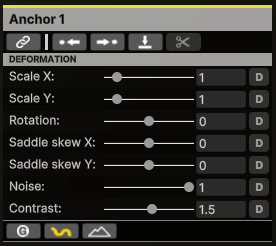
Will appear when a control point is selected and the bottom deformation button has been pressed. Has different effects that can be applied to deformations.
Control point - terrain:
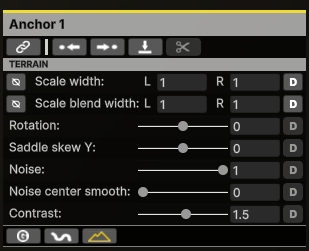
Will appear when a control point is selected and the bottom terrain button has been pressed. Has different effects that can be applied to the terrain.
Other features:
Snap/Move control points on object surfaces - Select a control point, hold down Shift + Ctrl, and then click the control point again to activate surface snapping. Now, as you move the control point, it will snap to and follow the surface of any object with a collider, allowing precise positioning along that surface.
Shortcuts:
Curve Architect has different shortcuts that can be changed in Unitys shortcut menu. Edit --> Shortcuts...
Components:
Architect Curve:
Add this component to any GameObject to create an Architect Curve. The curve type for an Architect Curve is a Bezier curve.
Architect Curve Object:
This component is handled automatically when using the editor in edit mode. However, if you create objects during runtime that you want to follow or deform along the Architect Curve, you will need to manually add this component (Use helper functions like HelperArchitectCurveObject.CreateDeformation/HelperArchitectCurveObject.CreateFollower).
Architect Curve Cache:
This component was removed in Curve Architect 1.4.0 and replaced by the "Keep in Build" feature. You can uncheck or check "Keep in Build" to keep or completely remove ArchitectCurve/ArchitectCurveObject components from your build.
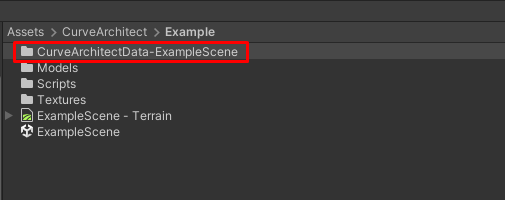
Curve Architect Data
Curve Architect generates binary files during terrain deformation. These binary files store terrain data, enabling you to revert the terrain back to its original state at any time. If you delete this data, you may experience unwanted 'build-up' of the terrain, and the 'Revert Terrain' button will cease to function.
If you have Resource Data in the general menu set to "Create on Save," Curve Architect will generate binary files for the different curves you use in your built game. You should not delete this data, as it can impact performance and cause certain features to stop working. If you set it to "Generate During Build," all files will be generated during the build process and automatically deleted afterward, so you won't see any of these files.
All of these binary files are located inside the 'CurveArchitectData-YourSceneName' folder. This folder will automatically be created when necessary.
Note: If you rename your scene file you need to rename the CurveArchitectData data folder to 'CurveArchitectData-YourNewSceneName'.
Mesh pooling
Curve Architect tracks all deformed meshes. For example, if a Mesh Filter and a Mesh Collider on the same Game Object use the same original mesh, only one mesh will be created.
Current limitations
- The rotation and position fields in the Inspector can’t be used for moving objects along an Architect Curve, you need to use the position- and rotation fields inside the Curve Architect Menus.
- Architect Curves can’t be used inside of prefabs.
